29 Jul 2026
How to Set Up a Google Merchant Center Account
Setting up a Google Merchant Center account is essential for selling products online through Google. This guide shows how to create and configure your account so you can list products and reach the right audience.
Guide
- Setting up Google Merchant Center
- Adding business information to your Google Merchant Center
- Verify and claim your Google Merchant Center
- Add shipping options to your Google Merchant Center
- Select how you want to add your products
- Read up on Google policies
- Final Review
- How to convert to an advanced account for those with multiple business accounts
Goal: To set up a new Google Merchant Center account.
Ideal Outcome: You’ll have successfully set up a Google Merchant Center account for your business or your client.
Prerequisites or requirements:
- You will need a Google account (such as Gmail)
- You will need your business details for verification
- If you do not already have a Google account, please sign up here
Why this is important: Setting up a Google Merchant Center account is crucial for businesses that want customers to discover, browse, and purchase their products online. It provides access to powerful Google features and detailed reporting tools, helping you connect the right products with the right audience.
Where this is done: In Google Merchant Center.
When this is done: Only once, during the initial setup of Google Merchant Center.
Who does this:
- Business owner
- Freelancer
- Marketing manager responsible
Setting up Google Merchant Center
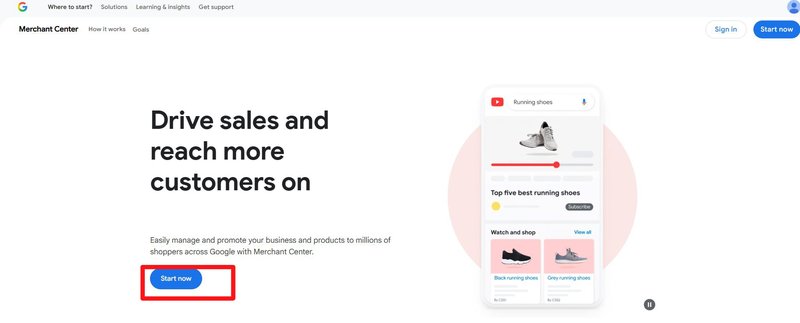
- Go to Google Merchant Center here and click “Get started.”
- Select your Gmail account and log in using your password
- Click “Next”
- You will be taken to a page where you need to provide information about your business
- Choose either yes or no to continue
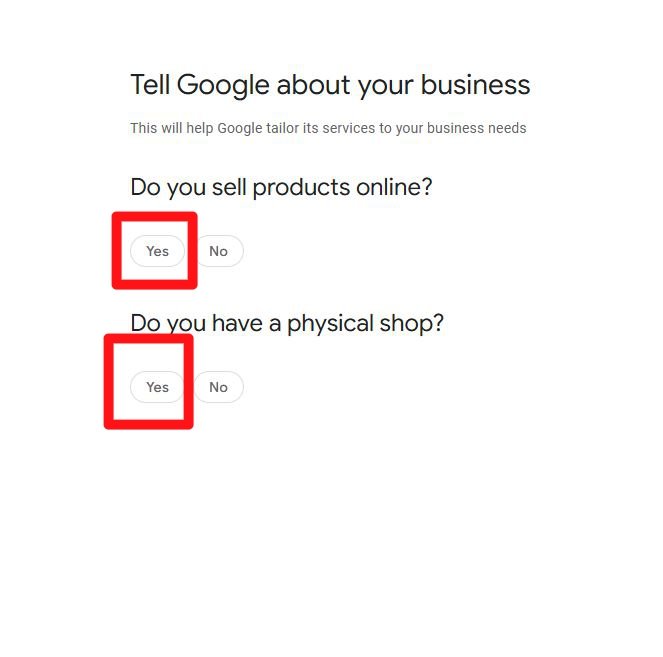
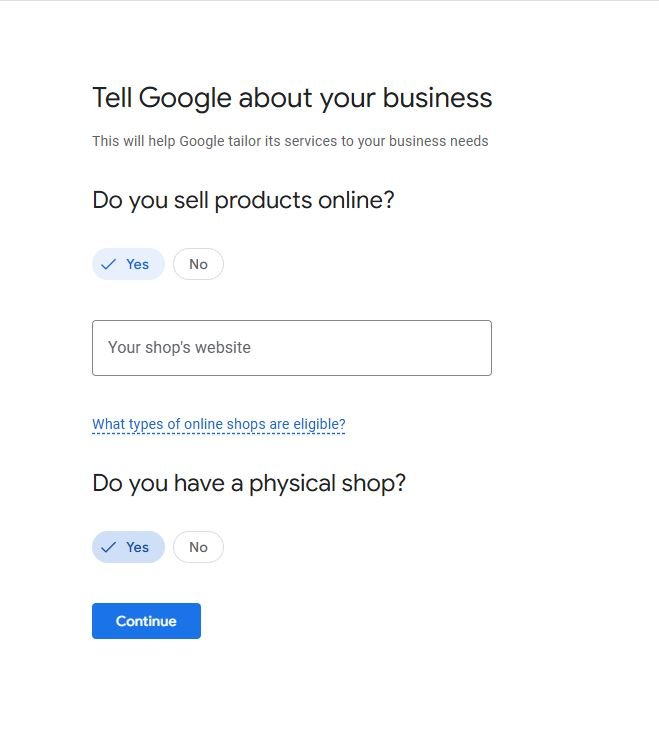
- If you select yes:
- Enter your website address
- Click “Continue”
- On the next page:
- Scroll down
- Click “Create a Google Merchant Center account.”
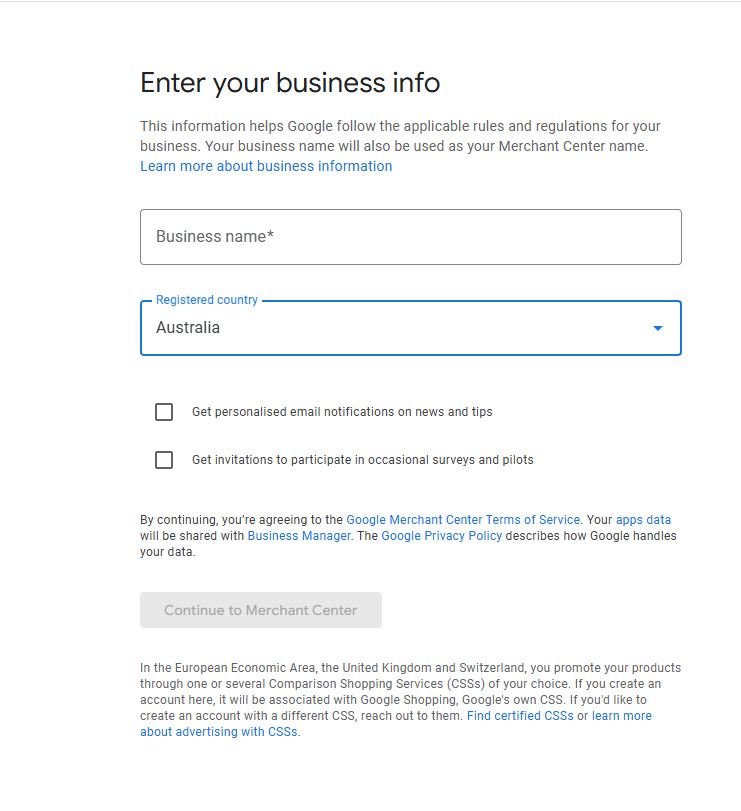
- Enter:
- Business name
- Registered country
- Click “Continue to Merchant Center”
- On the “Signup complete” page:
- Click “Continue”
- Next, provide:
- Business details
- Shipping information
- Product information
- Then verify and claim your website
Adding business information to your Google Merchant Center
- From the left navigation menu:
- Click “Add business details”
- Enter:
- Business address
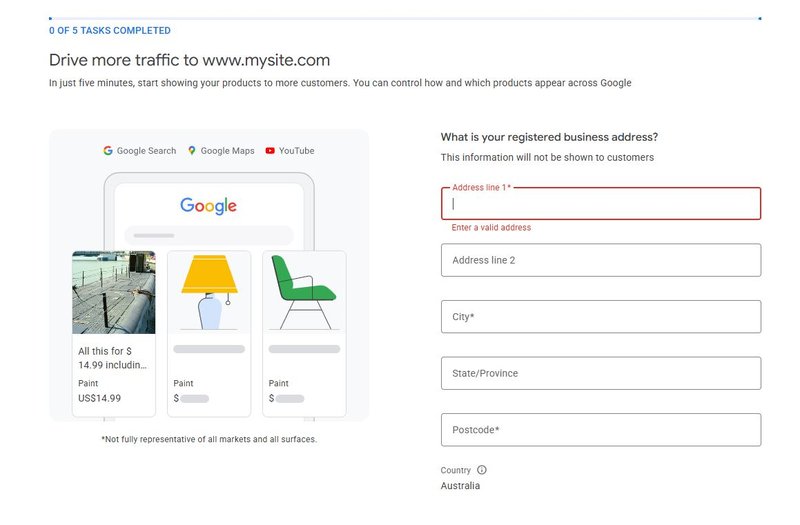
- Click “Save”
- Select:
- Country code
- Enter business phone number
- Click “Verify number”
- In the pop-up:
- Select “Text message”
- Enter the verification code sent to your phone
- Click “Finish”
Verify and claim your Google Merchant Center
- From the left navigation menu:
- Go to “Verify & claim website”
- Enter your website address
- Click “See other methods”
- Choose one of the following verification methods:
- Add/upload an HTML tag/file
- Google Tag Manager
- Google Analytics
- Recommended:
- Use “add/upload an HTML tag/file”
- Engage your web developer if needed
- Follow the steps shown on screen
- Click “Verify website” once complete
- After successful verification:
- Click “Continue”
Add shipping options to your Google Merchant Center
- From the left navigation menu:
- Click “Set up shipping.”
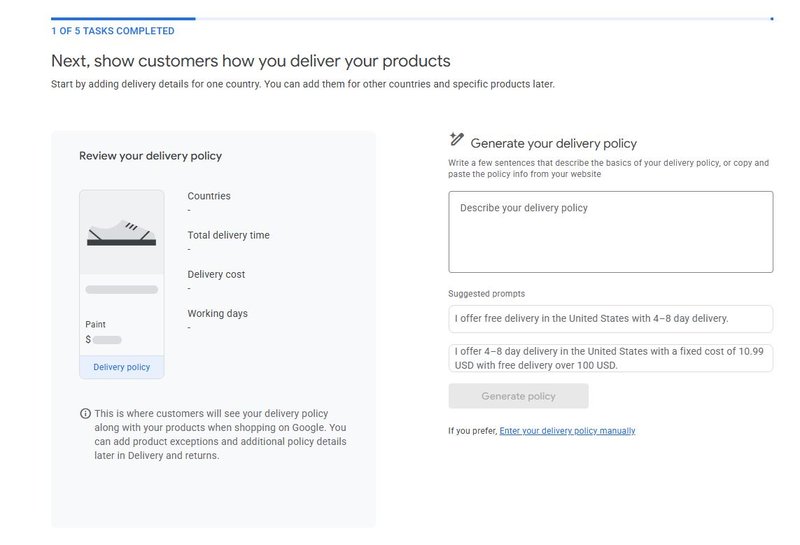
- Enter:
- Shipping service name
- Country
- Currency
- Under delivery location:
- Tick “All the customer’s address”
- Click “Next”
Delivery time setup:
- Select:
- Order cut-off time
- Time zone
- Enter:
- Order handling time
- Operating days
- To add more transit times:
- Click “More transit times”
- Under “All destinations”:
- Click “Add transit time label”
- Enter label
- [Optional]:
- Click “Delete table” to remove a label
- Review details
- Click “Next”
Shipping cost setup:
- Choose one option:
- Free shipping:
- Click “Save”
- Order value-based:
- Enter pricing conditions
- Range-based:
- Enter price ranges
- Define charges
- Flat rate:
- Enter cost under “All orders shipped for”
- Free shipping:
- [Optional]:
- Click “Add another range” to include more tiers
- Click “Save”
- Review summary page
- Edit using pencil icon if needed
- Click “Continue”
[Optional: Advanced shipping settings]
- Click “Switch to advanced setting”
- Click the plus (+) button
- Select:
- “All products”
- Add shipping rate name
- Choose one:
- Single rate:
- Enter cost and currency
- Click “Add dimension”
- Table-based:
- Select dimension:
- Order price
- Order weight
- Number of items
- Enter values and adjust costs
- Click “Add dimension”
- Select dimension:
- Single rate:
- To add rows:
- Click “+ row”
- Click “Continue”
- [Optional]:
- Add minimum order value
- Click “Save”
Select how you want to add your products
You have two options:
- Add products individually
- Enter all product details
- Click “Save”
- [Optional]:
- Switch to advanced settings
- Add additional product data
- Include promotion ID or product type
- Add multiple products
- Enter:
- Basic information
- Input method
- Select:
- Target countries
- Language
- Free listings destination
- Click “Continue”
- Name your primary feed
- Select input method (recommended: Google Sheets)
- Click “Continue”
- Choose:
- “Generate a new Google spreadsheet”
- Click “Create Feed”
- Grant access to your Google account
- Click “Access Google Sheet”
- Enter product data according to specifications
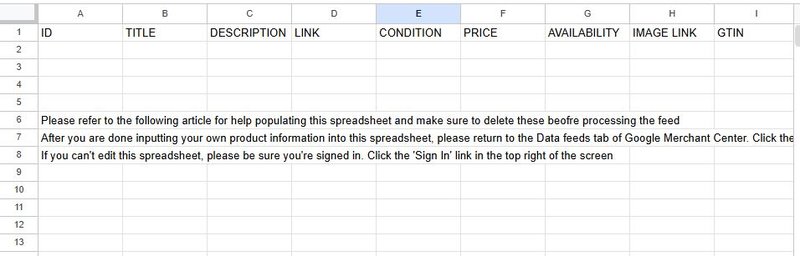
- Return to Merchant Center
- Click “Add products”
- Click “Fetch now”
- Review product overview page:
- Check listings
- Identify disapproved products
Read up on Google policies
- Click “View Google policies.”
- Review:
- Refund and return policies
- Product eligibility
- Click arrows to proceed through sections
- Click “View full Google policies”
- Carefully review to avoid future issues
- Click “Start final review”
Final Review
- Go to setup page
- Check for:
- Incomplete sections
- Errors or issues
- Click:
- “Final review”
- “Go to Overview”
- Google will review your submission
- Processing time: approximately 12–24 hours
How to convert to an advanced account for those with multiple business accounts
- Log in to Merchant Center
- Click “Get started”
- Select Gmail account
- Click “Next”
- On overview page:
- Click settings icon [Gear]
- Select “Account settings”
- Click “Advanced account setup”
- Click “Request conversion”
- Select options that match your business
- In the confirmation pop-up:
- Tick the box
- Click “Request conversion”
- Processing time: A few days
- You will receive an email notification once completed