07 Jul 2026
How to Install Google Tag Manager on Shopify
Installing Google Tag Manager on Shopify helps you manage tracking codes and marketing tags without editing your store code repeatedly. This guide explains how to correctly add and verify GTM on your Shopify store.
Guide
Goal: To install Google Tag Manager on a Shopify store.
Ideal Outcome: Google Tag Manager is added correctly and functions without any technical hiccups.
Prerequisites: You must already have Google Analytics connected to your Shopify store. If you haven’t done so, refer to SOP067 (web version) to get Analytics set up first.
Why this matters: Google Tag Manager makes it simple to add or update tracking pixels, scripts, and marketing tags, without needing to manually alter your store’s code each time.
Where this is done: Inside your Shopify admin panel and Google Tag Manager.
When this is done: Only once, during your initial Google Tag Manager setup.
Who completes this: Whoever handles website updates, performance tracking, or analytics in your business.
Environment Setup
Install the Google Tag Assistant Chrome Extension (free).
Then grab your Google Tag Manager container snippets.
SCENARIO 1: You don’t yet have a Google Tag Manager account
Create a Google Tag Manager account
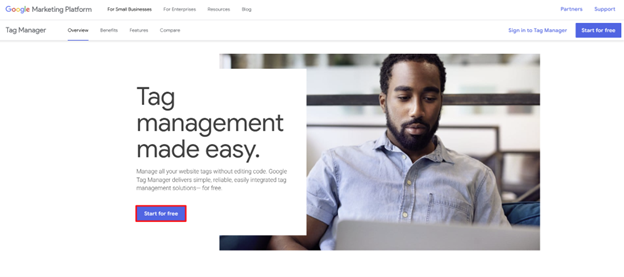
Log into your Google account when prompted.
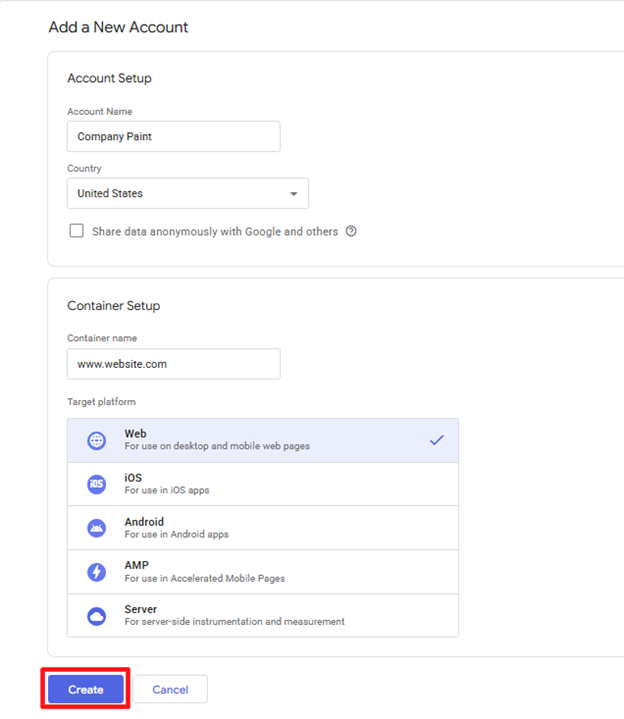
You’ll immediately be asked to set up a new Tag Manager account. Select “Create Account.”

Enter your account information, including name, country (e.g., Australia), store URL, and select your target platform. Click Create.
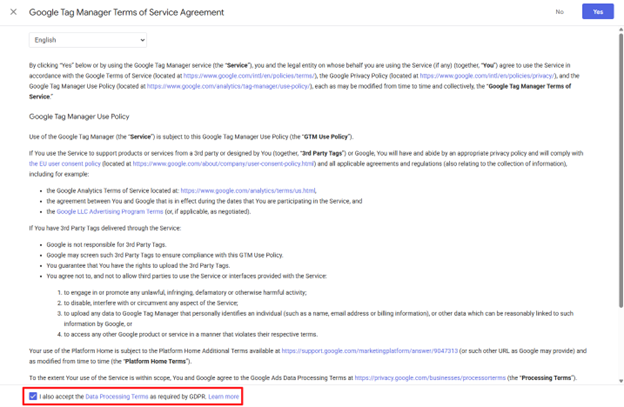
Accept the terms and conditions by ticking the checkbox and choosing Yes.
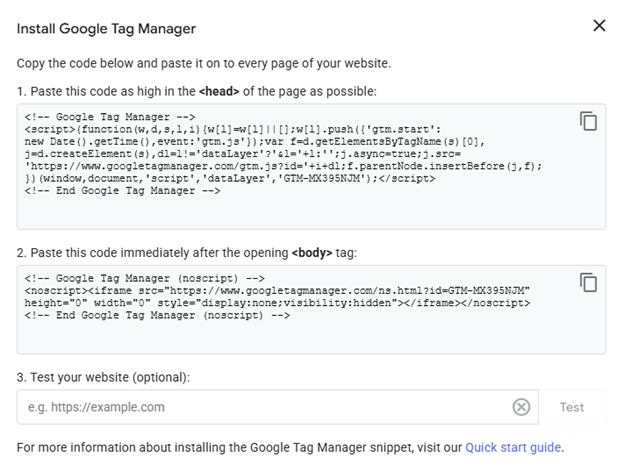
A pop-up will display your Google Tag Manager installation code. Stay on this screen; you’ll need both the first and second code snippets shortly when updating Shopify.
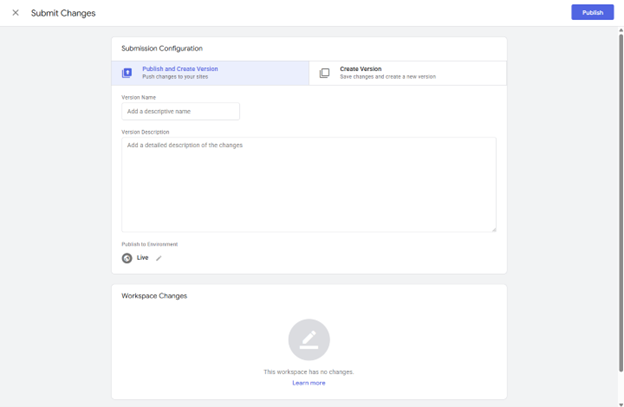
Once inside your Workspace, select Submit → Publish → Continue to publish your Tag Manager container.
SCENARIO 2: You already have a Google Tag Manager account
Log in to your GTM account.
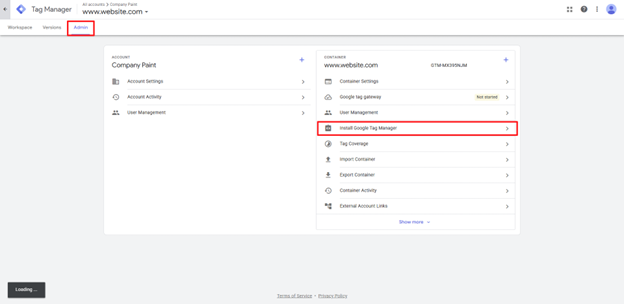
In the top navigation, click Admin → Install Google Tag Manager.
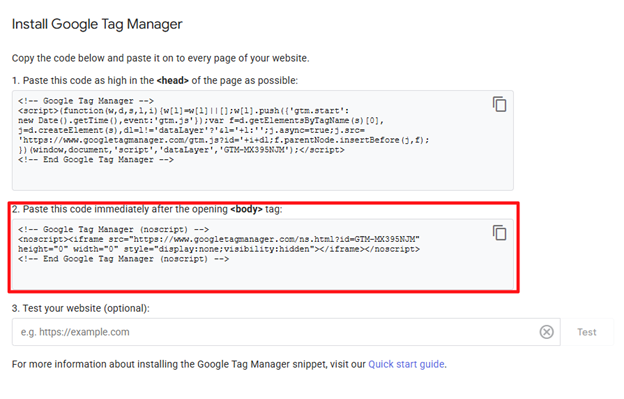
You’ll see two snippets of code. Copy the first one; you will paste it into Shopify soon.
Scroll to the second code snippet and keep the tab open so you can copy it when needed.
Add Google Tag Manager to Your Shopify Store
Note:
This method installs Google Tag Manager across all pages of your site. The official Shopify documentation only allows non-checkout tracking unless you’re on Shopify Plus.
If you are on Shopify Plus, follow Shopify’s official instructions instead.
1. Log in to your Shopify store
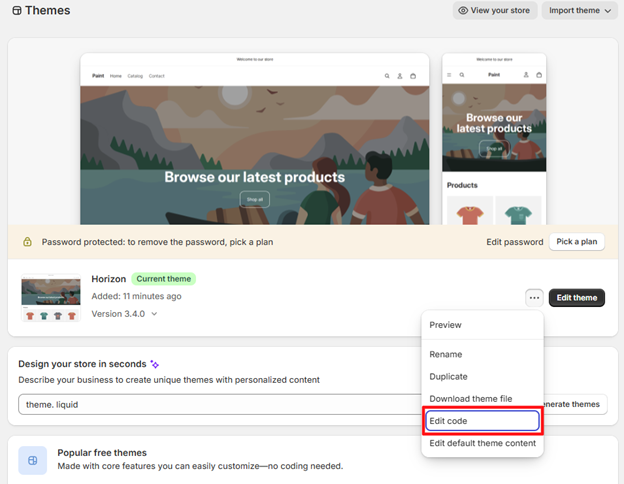
On the left-hand menu, under Online Store, select Themes.
Open the kebab menu (three dots) and choose Edit Code.
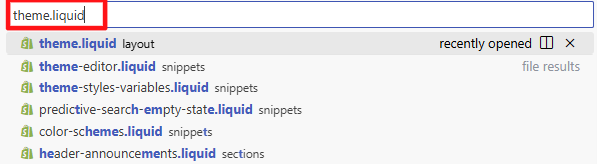
Use the search bar to find theme.liquid and click on it.
Look for the section that begins with <head> it normally appears around line 3.
Paste the first Google Tag Manager snippet directly underneath <head>.
Example:
Select Save at the top right.
Next, copy the second snippet and paste it just after the opening <body> tag, or place it around line 246 if that’s where your theme begins its body section:
Again, click Save.
QA: Checking Your Installation
Open your Shopify homepage in Chrome.
Launch the Tag Assistant Companion extension.
Select Enable.
Refresh your homepage, then open the Google Tag Assistant extension again.
You should now see a green indicator for Google Tag Manager, confirming the installation was successful.