11 Jun 2026
How to Create an Automated Welcome Email in Mailchimp
An automated welcome email helps you build trust with new subscribers from the moment they join your email list. This guide explains how to create and automate a welcome email in Mailchimp.
Guide
Goal: Create an engaging and compelling automated welcome email in Mailchimp.
Ideal Outcome: You create a welcome email that aligns with your brand voice and is automatically sent to new newsletter subscribers as soon as they sign up.
Why this is Important: Establishing a strong relationship with your subscribers from the outset is crucial. A well-crafted welcome email helps establish trust, sets clear expectations, and provides an immediate opportunity to engage your audience, significantly increasing the likelihood that subscribers will interact with your content and return to your business.
Where this is Done: Primarily within Mailchimp, an online platform that allows businesses to automate email marketing, including welcome emails.
When this is Done: Ideally, as soon as you begin building your email list. This ensures the welcome email is ready before your first subscribers join.
Who does this: You, your content writer, your email marketing specialist, or a digital marketing agency you have engaged.
Environment Setup
Create an account with Mailchimp. The platform is free for small businesses with fewer than 2,000 subscribers and/or sending fewer than 12,000 emails per month.
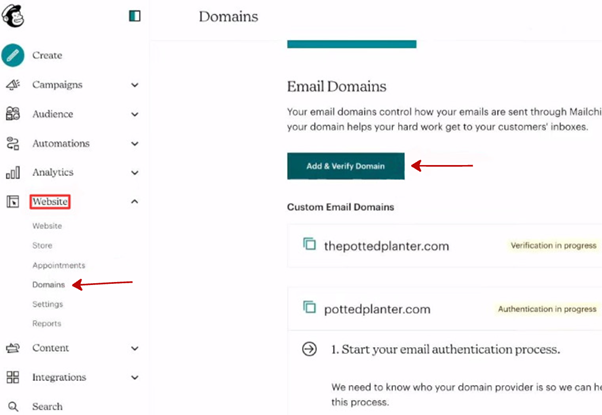
Once your Mailchimp account is created, verify your email domain:
● In the navigation menu, click Website
● Select Domains
● Click Add & Verify Domain
● Enter your email address and click Send Verification Email
● Open the verification email and confirm your domain
Enable the New Email Builder
We recommend using Mailchimp’s new default email builder:
● Click your profile photo in the top-right corner
● Select Profile
● Under Settings, click Details
● Scroll down and select New Builder
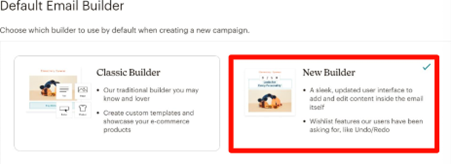
This builder will now be used by default when creating emails and allows you to edit content directly within the email using Mailchimp’s updated interface.
Writing an Effective Welcome Email
There is no universal formula for writing the perfect welcome email. Much depends on your business, brand, and audience. However, following a clear structure will help ensure your email is engaging and effective.
Recommended Structure
You can adapt this framework to suit your brand:
Start with a greeting
- Thank your new subscriber and acknowledge their decision to join your list.
- Set expectations
- Explain what type of content they will receive and how often you will email them.
- Introduce yourself or your business. This builds credibility and trust.
- Include a call to action
Examples include:
○ Directing them to your most popular blog posts
○ Ask them to whitelist your email address
○ Inviting them to reply with a question or feedback
- Add a signature. Keep it simple and professional (your name or full name works well).
- Include a headshot (optional)
This can increase trust and make the email feel more personal.
Example Welcome Email
Hi there,
Thanks so much for joining the Paints newsletter. This is where you’ll learn practical digital marketing strategies you can actually use, so you’ve made a great choice.
I’m Jerry, the CEO of Paints. I’ve been working in SEO and digital marketing for over a decade, and I created Retrograde to help business owners get real results online.
You might want to start with our Six-Figure Project or our guide on gathering SEO intelligence for your website.
Kind regards,
Jerry M.
Automating Your Welcome Email
Sending individual welcome emails manually is inefficient. Mailchimp makes automation simple if you follow these steps:
● Log in to your Mailchimp account
● Go to Campaigns
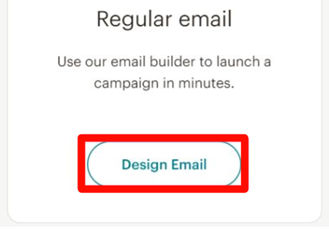
● Click Create new
● Select Design email under Regular email
● Click Automations and then Get Started
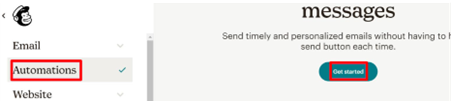
● On the Automation page, click Get started again
● Click Continue on the pop-up
Configure the Automation Flow
● Click the first box in the automation flow
● Select Change starting point
● Choose Sign up for Email as the trigger
You may add multiple starting points if required.
Add Journey Points
It is recommended to add a Journey Point to control timing and actions:
● Add a Time delay so emails do not feel robotic
● Optionally add another email later, such as a short survey to collect additional information from subscribers
Design the Email
● Scroll down and click Select a template
● Click Edit and complete:
○ To & From
○ Subject
○ Schedule
● Enable Google Analytics tracking (recommended)
When designing the email, we recommend using a plain-text–style layout. This feels more personal, less promotional, and often results in higher engagement.
Add your content by clicking the content blocks and editing text or images in the panel on the right. Once finished, click Save & Close.
That’s it. Your automated welcome email is now live in Mailchimp. Simple to set up, highly effective, and a great first impression for every new subscriber.