
Goal: Learn how to easily turn your blog posts into engaging social media updates.
Ideal Outcome: By the end of this guide, you’ll have a smooth, repeatable way to bring more traffic to your blog and keep your social feeds active with strong, relevant content (and ideally without relying on cat videos).
Prerequisites:
- A working WordPress.org site
- Yoast SEO installed (if not, follow SOP 008 to set it up
Why this matters: Social media remains one of the strongest ways to promote your blog, build a loyal audience, and show potential clients what your business offers. Having a consistent, reliable method for turning blog posts into social posts helps you increase reach while keeping your brand voice uniform across platforms.
Where this happens: Google Sheets, WordPress, and a few helpful third party tools.
When this happens: Every time you publish a blog post and want it to perform well on social platforms.
Who does this: You, someone on your team, or even a tech savvy relative this process is simple enough to teach quickly.
Environment Setup
- Open your WordPress dashboard and click Edit on any existing blog post.
- Ensure you have access to your business Facebook and Twitter accounts.
- Open the provided Google Sheet this will store all your social copy.
- Create a Stencil account (free plan gives 10 images/month; paid is usually required if you post often).
- Create a Buffer account.
- Create a MeetEdgar account.
Creating Content for Your Social Posts
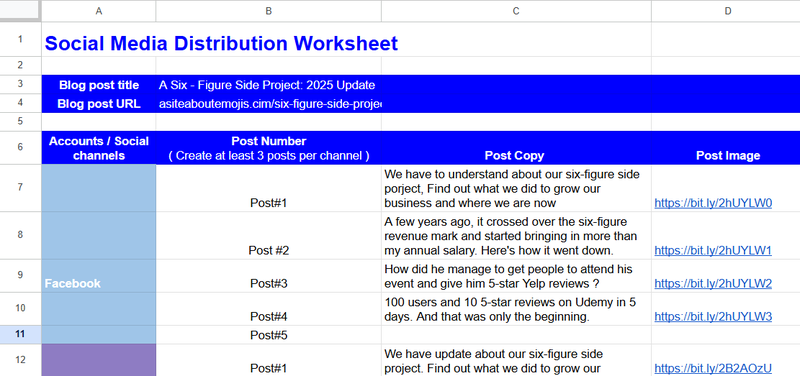
Choose one blog post to work with. For this exercise, the sample post is A Six Figure Side Project.
You should create at least 3 social posts per channel, although aiming for 5+ is ideal. Here are four simple ways to turn your blog content into social posts:
1. Use the headline
The headline is still your strongest hook don’t just copy/paste it, though. Add context or tease the value behind it.
Example:
“We’ve got new updates on our six figure side project here’s how we scaled it and what’s next.”
2. Pull a strong quote
Instead of picking any random line, choose something compelling enough to make someone curious.
Example:
“A few years ago, it crossed six figure revenue and began earning more than my annual salary. Here’s how.”
3. Ask a question
Think like a reader what question would they naturally ask after seeing one of your key points?
Example:
“How did he manage to fill his event and score perfect 5 star Yelp reviews?”
4. Highlight a statistic
Stats grab attention instantly.
Example:
“100 users and ten 5 star reviews on Udemy in the first 5 days and that was just the start.”
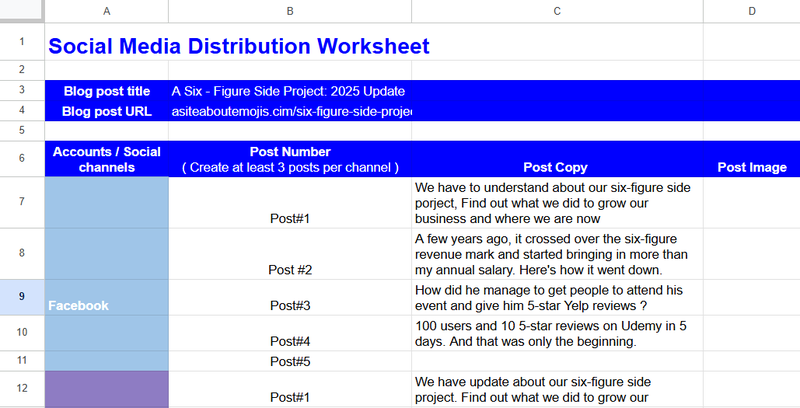
When you’re done writing, fill these into the Google Sheet.
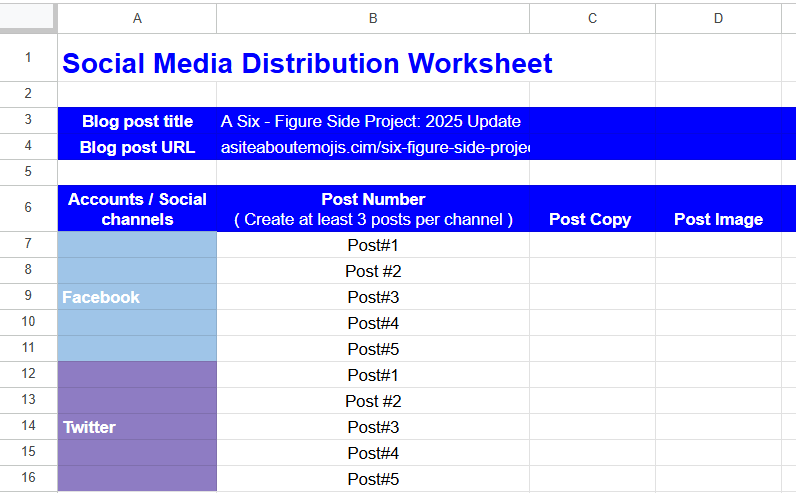
Name the tab after your blog post, enter the post title and URL, then list each channel (e.g. Facebook, Twitter). Add your social copy to the appropriate columns.
For Twitter, ensure the text is under 280 characters use any free online character counter tool.
Creating Graphics for Your Social Posts
Once your copy is ready, it’s time to design your visuals in Stencil.
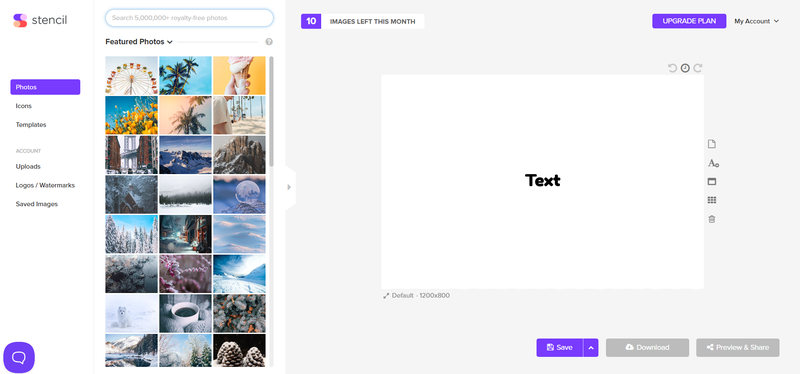
Stencil includes:
- Photos: Royalty free images to match your content
- Icons: Searchable library for simple graphics
- Templates: Great for consistent branding (paid accounts only)
- Quotes: Add popular quotes if relevant
You can also upload your brand assets, such as:
- Business images
- Logos or watermarks
- Saved templates
On the right side of Stencil, you’ll see your canvas and a few important editing tools.
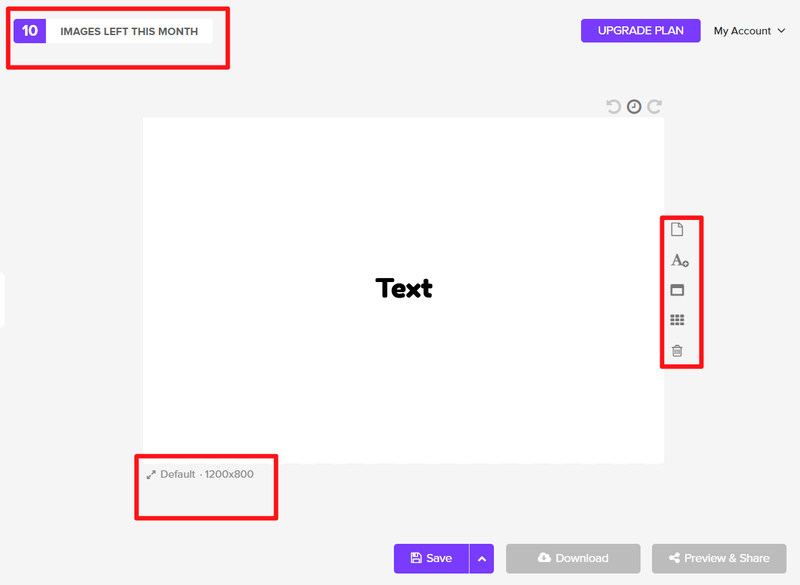
Key tools:
- Shows your remaining images for the month
- Creates a new image
- Adds/edit text
- Resizes the canvas (sizes match major social platforms automatically)
- Shows the Facebook Ads grid (helps keep text within limits)

- Clears the canvas
- Displays current canvas size options
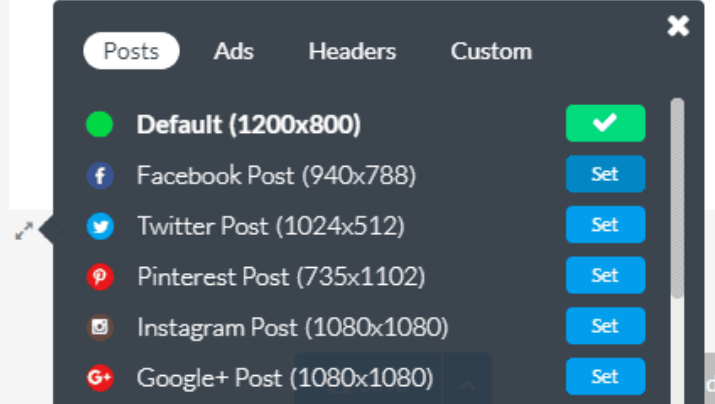
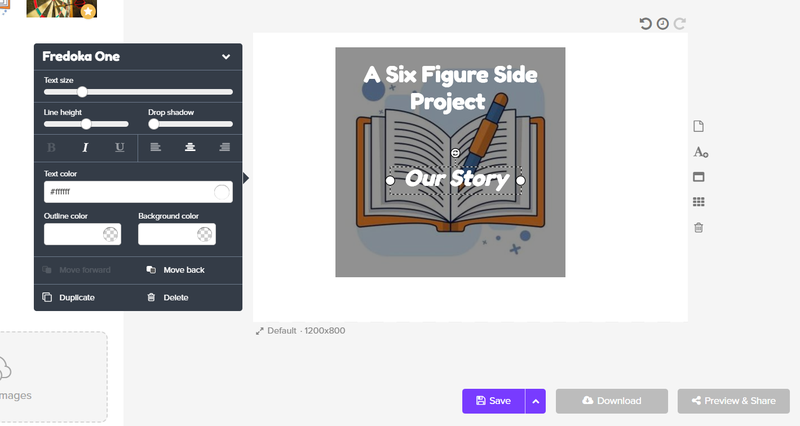
Create a Facebook Post Image
- Select the Facebook canvas size.
- Upload an image from your blog or choose one from Stencil.
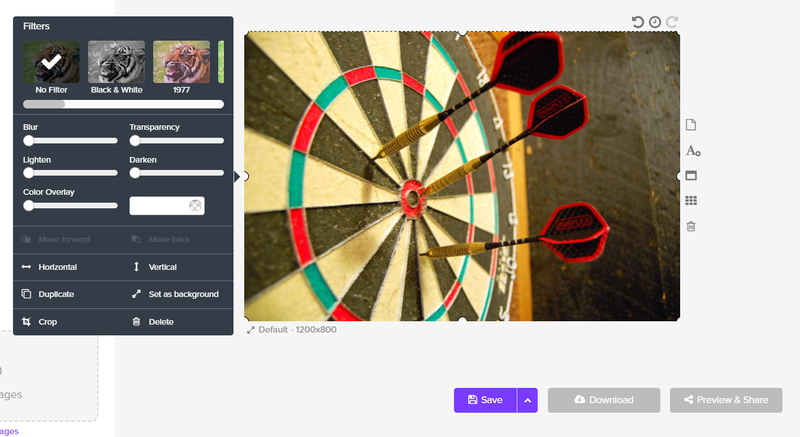
- Click the image to add effects and filters.
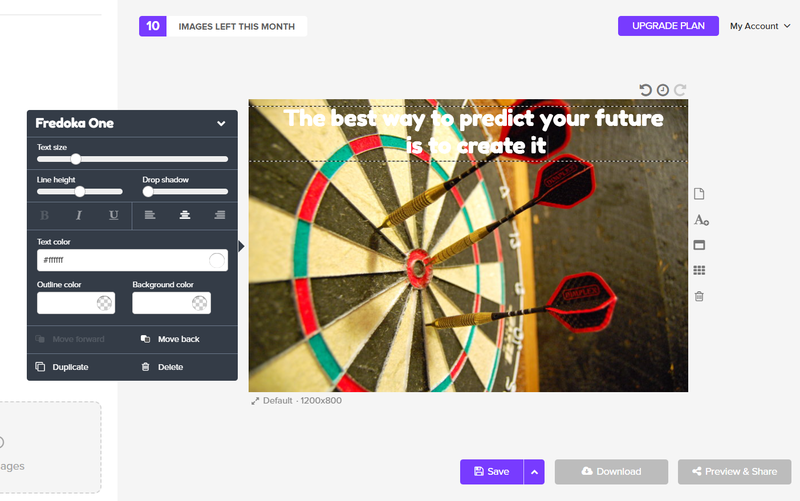
- Add a quote or relevant text using the text tool.
Save and download your design, then paste the shareable link into the worksheet. Repeat the process for each Facebook post.
Create a Twitter Post Image
- Choose the Twitter Post canvas.
- Upload your image or choose one from Stencil.
- Adjust effects, filters, and fonts.
- Add icons if helpful.
Save the image, copy its shareable link to your sheet, and repeat for the remaining tweets.
Using Templates
Stencil’s templates are a fast way to create attractive posts.
- Choose a Facebook, Twitter, or platform specific template.
- Edit the image, text, and layout.
- Save and paste the link into the worksheet.
When finished, your worksheet should look similar to this:
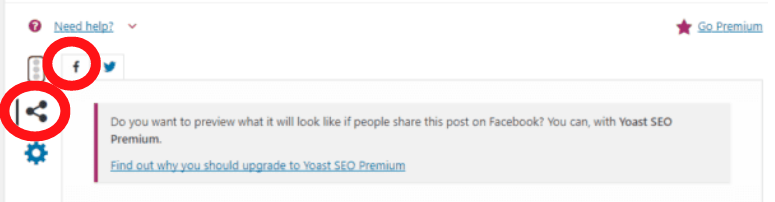
Verify Your Facebook & Twitter Link Previews
Before sharing your blog post widely, check how it appears when someone shares it.
- Use the Facebook Sharing Debugger.
- Paste your URL and click Debug.
If the preview looks poor (cut off text, boring image), edit your post in WordPress.
Scroll to the bottom and open the Yoast Social tab → Facebook.
Fill in:
- Facebook title
- Facebook description
- Facebook image (use a Stencil image from your worksheet)
Update the post, then re test the link preview.
- Open Twitter Card Validator.
- Paste your URL and preview the card.
If text or visuals look off, return to WordPress → Yoast Social → Twitter.
Add your custom:
- Twitter title
- Twitter description
- Twitter image
Update and preview again.
Distributing Your Posts
You’ll use Buffer and MeetEdgar for scheduling.
Using Buffer
Connect your social accounts:
Now you can:
- Paste your social copy
- Upload your image
- Add your blog URL
- Select which channels to post to
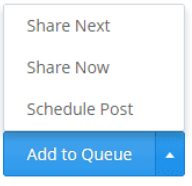
Posting options include:
- Add to queue
- Share now
- Share next
- Schedule to a specific time
We recommend posting once per channel every two days.
Using MeetEdgar for Evergreen Content
MeetEdgar is excellent for recycling posts automatically.
- Add your social accounts (up to 25).
- Add new content, paste your copy, URL, and image.
- Select a category such as My blog posts.
- Adjust scheduling settings (recurring or time specific).
Save your content to the library.
You can view the performance history and manage your queue.
Connect your blog feed so MeetEdgar can automatically pull new posts:
Set your posting schedule using Quick Setup or manual time slots.
After reviewing your queue, click Unpause to let MeetEdgar publish automatically.
And that’s it you now have an easy, repeatable system for generating social posts from your blog content. As we say in Australia, “Work smarter, not harder.”