09 Apr 2026
How to Create and Submit an SEO Sitemap
A well-structured sitemap helps search engines crawl and understand your website more effectively. This guide explains how to create, optimise and submit your sitemap to ensure key pages are indexed and prioritised correctly.
Guide
Goal: To set up your sitemap for the first time, or to review and audit your existing sitemap.
Ideal Outcome: Your sitemap has been successfully fetched by Google, includes your key URLs, and is properly configured so search engines can easily crawl and understand your website.
Prerequisites or requirements: You need access to your website’s Google Search Console property. If it is not set up yet, follow the instructions in SOP 020 (web version).
If you are using WordPress, you will need to install and activate the Yoast SEO plugin. If it is not yet installed, refer to the instructions in SOP 008 (web version).
Why this is important: A sitemap helps search engine crawlers find and understand the structure of your website more efficiently. It highlights the most important pages and ensures key content is discovered quickly. For example, an Australian online retailer selling outdoor gear might want Google to prioritise its homepage, product category pages, and popular items such as camping equipment or surf accessories.
Where this is done: In Google Sheets (or spreadsheets), your WordPress Admin Panel, and Google Search Console.
When this is done: Ideally, a sitemap should be created when the website is first launched. If the sitemap is generated manually, it should be updated whenever new pages are added that need to be indexed by search engines.
Who does this: The person responsible for SEO or website management.
Included Resource: Sitemap Designer Spreadsheet: Use this spreadsheet to design your sitemap or audit your existing one while ensuring all sitemap settings are correctly defined.
Designing Your Sitemap
Start by gathering a list of all URLs on your website.
If you already have a sitemap and are auditing it, you can simply use that list.
If you are using WordPress, you can skip ahead to “Generating your sitemap.”
If you are using a custom platform or do not have a CMS and do not already have a URL list, request it from your web developer or the company that built your website.
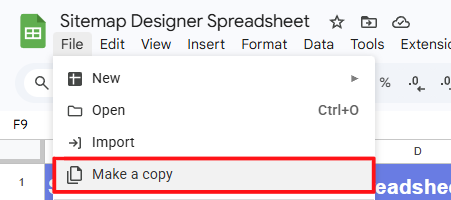
Open the Sitemap Designer Spreadsheet included with this SOP. Then click File → Make a copy.
Paste your URLs into the spreadsheet.
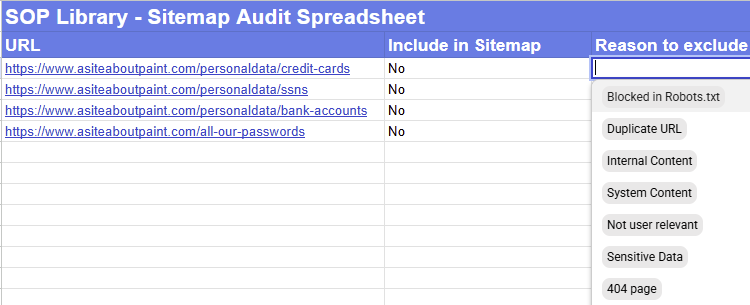
For each URL, decide whether it should be included in the sitemap. If it should not be included, select the reason why. Mark a URL as “Yes” if it meets the following criteria.
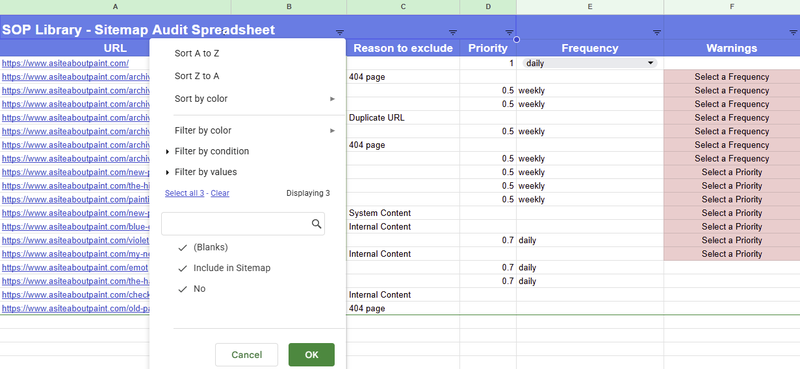
Note: If you have a large number of URLs, use spreadsheet filters to speed up the process.
Example: If you want to exclude all pages in the /personaldata/ subfolder, filter those URLs and mark them all as “No.”
A URL should only be included if:
- It is not blocked by the robots.txt file.
If you do not yet have a robots.txt file, follow SOP 057 (web version). If you are unsure whether a URL is blocked, follow the validation procedure described there. - It does not point to duplicate content.
Example:
examplewebsite.com/summer-sale-beach-hats
examplewebsite.com/summer-sale-beach-hats?tracking_parameter
- It does not contain sensitive information.
Example: internal pricing sheets, client details, internal company documents, or operational procedures.
Note: These pages should ideally be no indexed and protected by login or password access.
- It is not a system generated file or irrelevant page.
Example: system logs, configuration files, or automatically generated backend pages.
As a general rule, any URL that should not appear in search results or that does not provide useful information to users should not be included in the sitemap.
Remember: Removing a URL from the sitemap does not automatically remove it from search engines.
Assign Priority and Frequency
For every URL included in the sitemap, assign a Priority and Frequency.

Priority:
A value between 0.1 and 1.0 representing the relative importance of a page compared to other pages on your website.
- 0.1 indicates very low importance
- 1.0 indicates the highest priority
The default value is 0.5.
Example:
A homepage or main category page for a Melbourne travel blog may receive a higher priority than older blog posts.
Note: Do not spend excessive time deciding priorities. If unsure, setting everything to 0.5 is perfectly acceptable.
Also avoid setting every page to 1.0, as this signals that all pages are equally important.
Frequency:
This indicates how often the page content changes.
Note: This is only a suggestion to search engines and not a strict instruction.
Options include:
- Always: Only use this if the content changes constantly (e.g. real time stock prices or weather updates).
- Never: Only use this for archived pages that will never change again.
- Hourly, Daily, Weekly, Monthly, Yearly: Choose the option that best matches how often the content is updated.
Avoid selecting Yearly unless absolutely necessary, and avoid Hourly unless the content truly changes that often.
Generating Your Sitemap
If you are using a popular CMS such as Drupal, Joomla, or similar, the sitemap feature may already exist or can be added through an extension.
This SOP specifically explains the process for WordPress, but if you have a custom site without a CMS, follow the steps below.
For Custom Websites (No CMS)
Open the sitemap spreadsheet you created earlier and filter the URLs that should appear in the sitemap.
Open Google Chrome and go to:
https://timestampgenerator.com/xml-sitemap-from-list
Copy and paste groups of URLs from your spreadsheet into the XML Sitemap generator according to their Priority and Frequency settings.
Click “Add to Queue” until all URLs have been added.
Note: Before clicking Add to Queue, clear any URLs already in the text box to avoid adding duplicates.
Example:
Filter all URLs with Priority 0.5 and Frequency Weekly, then paste them into the tool.
Step 1: Copy groups of URLs from the spreadsheet.
Step 2: Add the URL group to the queue.
Once all URLs are added, scroll down and click “Create Sitemap.”
Your browser will download the XML sitemap file.
The file should be named sitemap.xml. If it is not, rename it accordingly.
You must now upload this file to the root directory of your domain.
Example:
www.examplewebsite.com/sitemap.xml
If you do not have access to the server, ask your web developer or website provider to upload it for you.
If you already have a robots.txt file, add the following line:
Sitemap:http://www.yourdomain.com/sitemap.xml
Replace yourdomain.com with your actual domain.
Example:
Sitemap: http://www.examplewebsite.com/sitemap.xml
If you are unsure whether a robots.txt file exists, refer to SOP 057.
If you need a developer to upload the file, you can use a message similar to this:
“Hi,
I have created a sitemap to improve the website’s SEO performance. The file is attached to this email and should be placed in the root directory of the domain with the name sitemap.xml.
Please also update the robots.txt file located in the root directory and add the following line at the end:
Sitemap: http://www.yourdomain.com/sitemap.xml
Thank you.”
Once this is completed, your sitemap will be ready to submit.
Remember to repeat this process whenever new pages are added to your website. If your website publishes new pages frequently (such as blogs or product pages), it may be worth asking your developer to automate sitemap updates.
If You Are Using WordPress
Install the Yoast SEO plugin following SOP 008 (web version).
In the WordPress Admin Panel sidebar, click Yoast SEO → General.
Under Features, enable XML Sitemap Functionality.
Click User Sitemap and enable Author/User Sitemap if your website has multiple authors and you want their content indexed separately.
Under Post Types:
Posts:
Keep enabled unless you specifically do not want blog posts included in your sitemap.
Pages:
Leave enabled in most cases.
Media (Attachment Pages):
Usually disabled. WordPress creates separate pages for uploaded media files, which are typically unnecessary for a sitemap.
Example:
http://www.examplewebsite.com/red-surfboards/surfboard-fire
Click Excluded Posts if there are pages you previously decided to exclude. Enter their Post ID.

If you do not know the ID:
Go to Posts → All Posts, open the post, and look at the URL in the browser. The number after post= is the ID.
Click Taxonomies:
If your website uses categories and tags, leave the settings as default. If not, disable them.
Click Save Changes.
Submitting Your Sitemap to Google Search Console
Note: Google Search Console must already be set up. If not, follow SOP 020.
Go to:
https://www.google.com/webmasters/tools
Log in with your Google account.
If you manage multiple websites, select the correct property.
On the sidebar, click Sitemaps.
If you are using the old interface, click Try the new Search Console.
Under Add a new sitemap, enter the file name:
- sitemap.xml (if created manually)
- sitemap_index.xml (if generated through Yoast SEO in WordPress)
Then click Submit.
Click Got it.
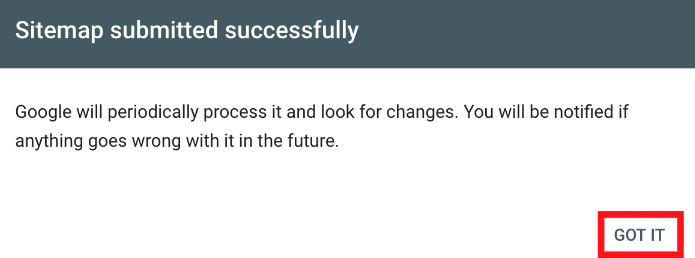
If everything has been set up correctly, Google will show that your sitemap has been successfully fetched.
If there is an issue, Google Search Console will display an error message explaining what needs to be fixed.