
Goal: To stop tracking any traffic generated by you, your team, or contractors.
Ideal Outcome: Internal activity no longer skews your Google Analytics 4 metrics.
Prerequisites: Google Analytics 4 must already be installed on your website.
Why this matters: Internal visits can distort your data sometimes dramatically leading to poor decision making. Clean, accurate data gives you a realistic picture of how real users behave.
Where: Inside your Google Analytics 4 property.
When: Right after setting up Google Analytics, and anytime internal traffic may be affecting your reports.
Who: Anyone responsible for analytics, along with internal team members whose visits need to be excluded.
Define Internal Traffic in GA4
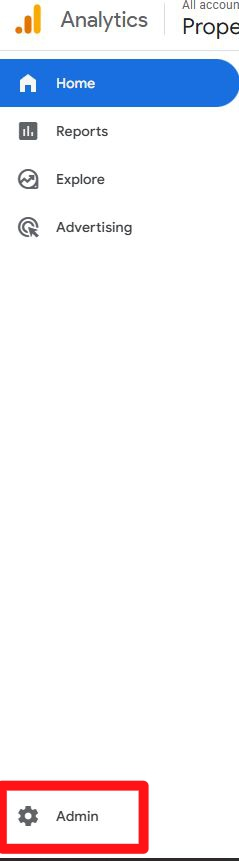
- Log into Google Analytics and click Admin.
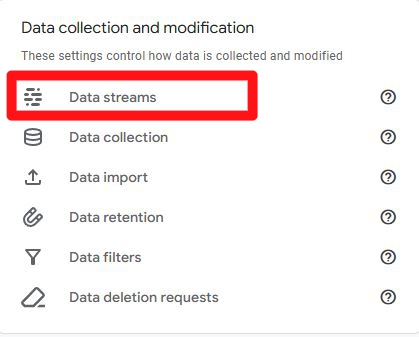
- Ensure you’ve selected the correct property, then click Data Streams.
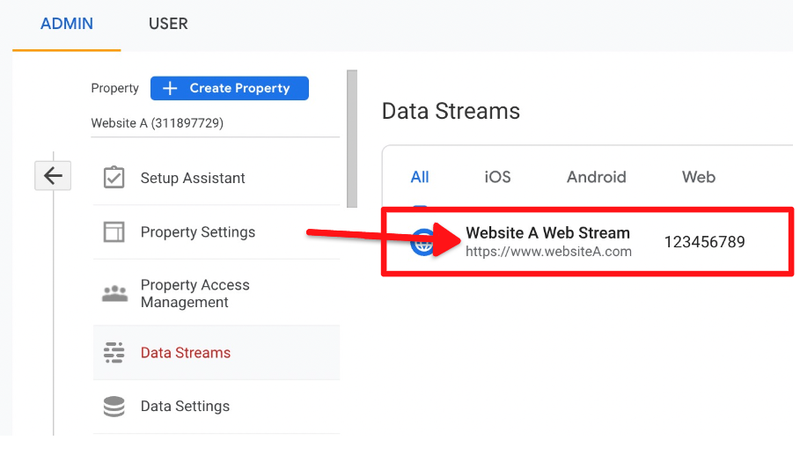
- Choose the website you’re working on.
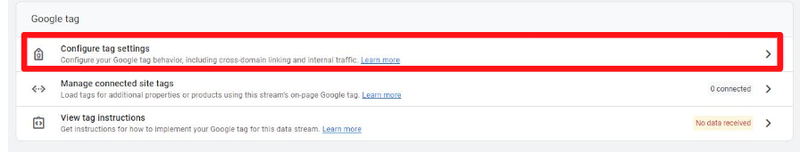
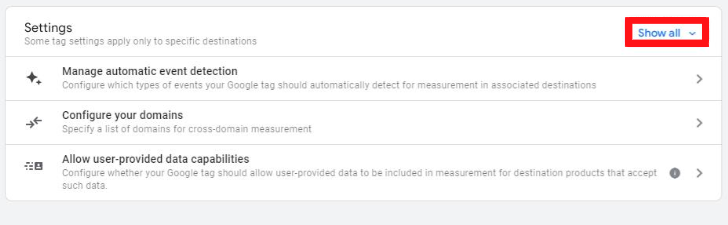
- Scroll down and select Configure Tag Settings under Google Tag.
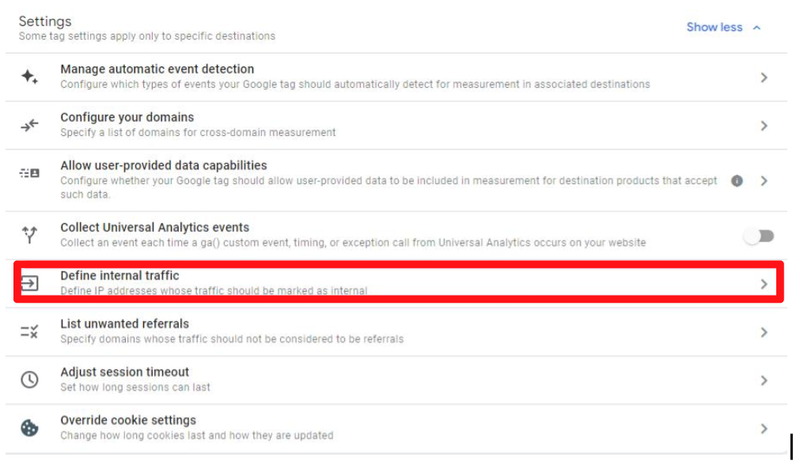
- Under Settings, click Show all.
- Select Define internal traffic.
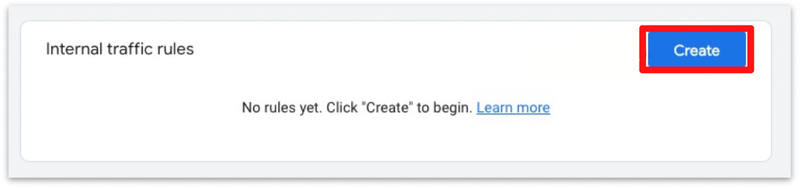
- Click Create to add your internal traffic rule.
- Name the rule Internal traffic and keep the default traffic_type value as internal.
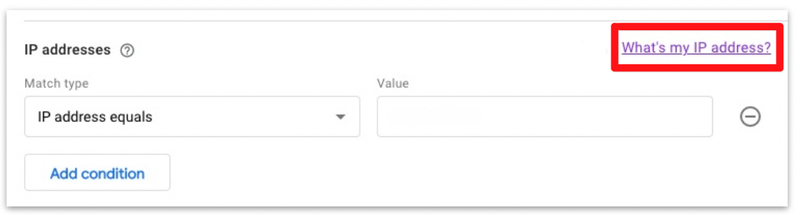
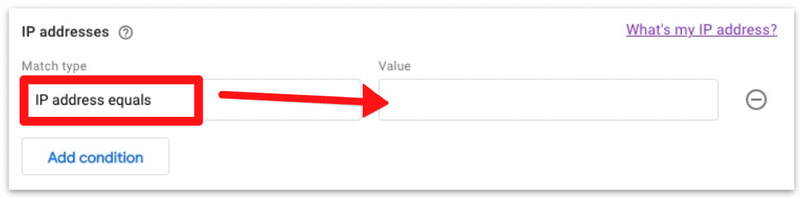
- Set Match type to IP address equals, then enter your IP address.
If you don’t know your IP, click What’s my IP address, and Google will display it.
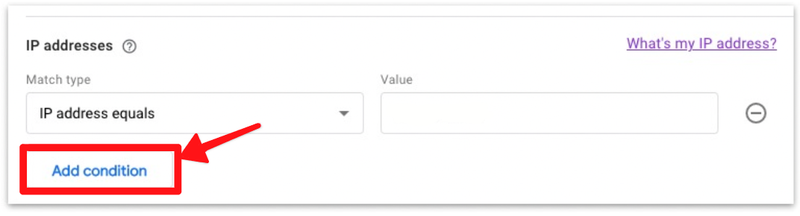
If you need to exclude several team members, click Add condition and repeat the previous step for each IP.
You’ve now defined your internal traffic. Next step: activate the filter.
Activate the Internal Traffic Filter in GA4
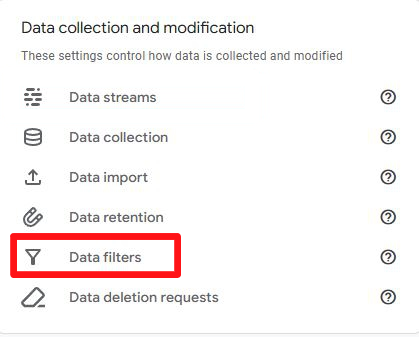
- Go back to Admin.
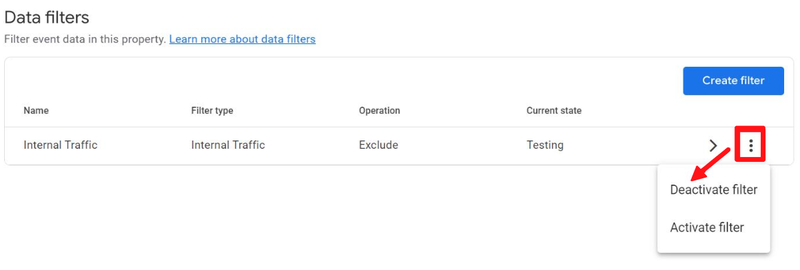
- Under Data Settings, click Data Filters.
- You’ll see a default internal traffic filter. Make sure it’s in Testing mode first.
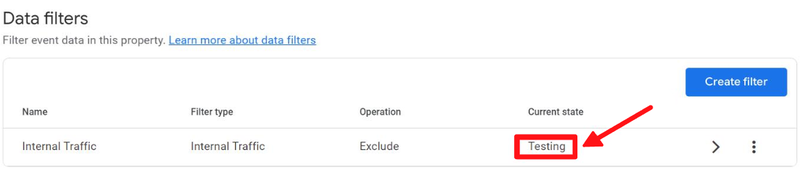
- If it isn’t, click the kebab menu (three dots) and choose Test filter.
Test the Internal Traffic Filter
Filtering in GA4 is permanent, so testing before activation is essential.
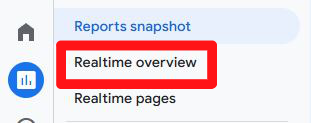
- Go to Reports → Real-time.
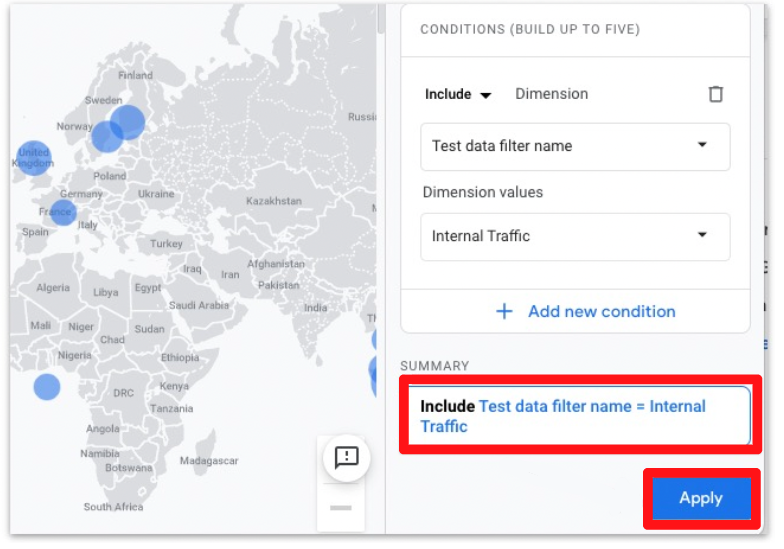
- Click Add comparison → Select dimension. Search for the Test data filter name and select it.
- Under Select dimension values, choose Internal Traffic → OK.
- Check that everything looks right and click Apply.
Open a new browser tab, visit your website, then return to the Real-time report. You should see 1 user marked as internal test traffic. This confirms the filter is working.
Activate the Filter
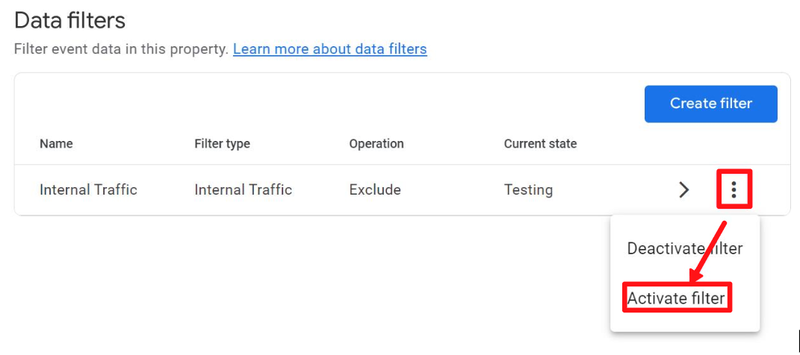
- Go back to Admin.
- Select Data Filters again.
- Open the kebab menu beside the internal traffic filter and choose Activate filter.
Once activated, internal traffic will be excluded from your GA4 data going forward.